Oboz Sawtooth II Mid Dry Hiking Boots

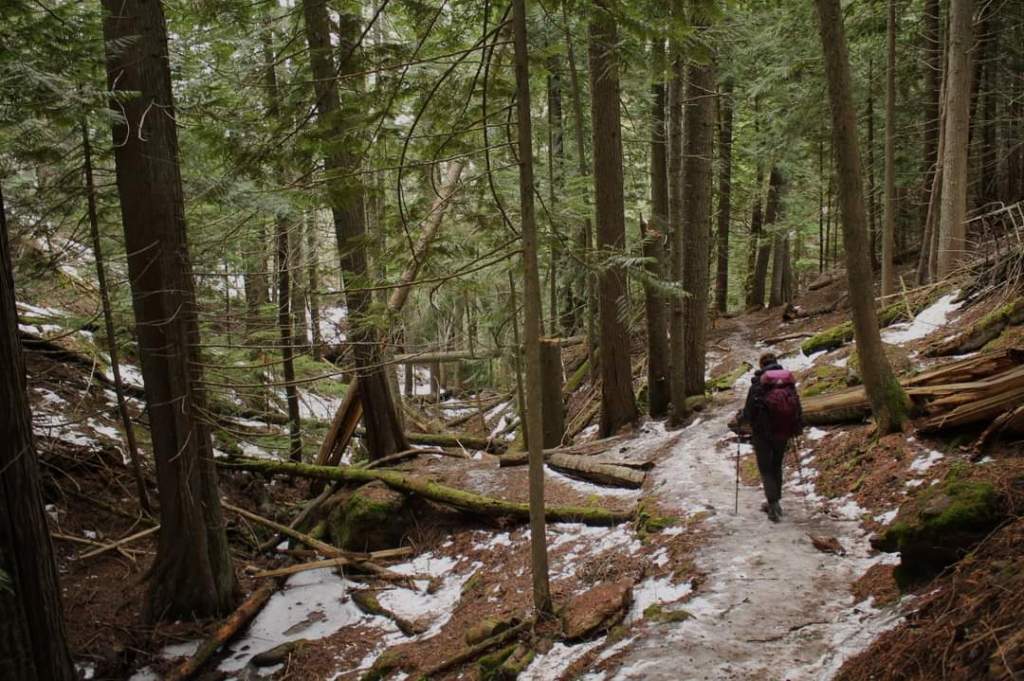
Let’s talk hiking boots. Why is it so important to wear a good pair of hiking boots? It’s simple. Hiking boots are guaranteed to offer the maximum amount of support and protection possible to your feet and ankles.

When I first started hiking, I was that person who hiked in Nike running shoes. Then a hike on Mt. Spokane went terribly wrong and hiked for 14 hours with a total of 47 miles.

Within a week I was already researching many different brands of hiking boots and narrowed down my list. I then took my list to REI and tried on every boot on that list. The salesman was very knowledgeable, asking questions and recommending a few different boots for very specific features. He also made sure I walked a circle around the entire upper level of store which helped me narrow my list down even more. I kept going back to the Oboz Sawtooth II Mid Dry Hiking Boots.

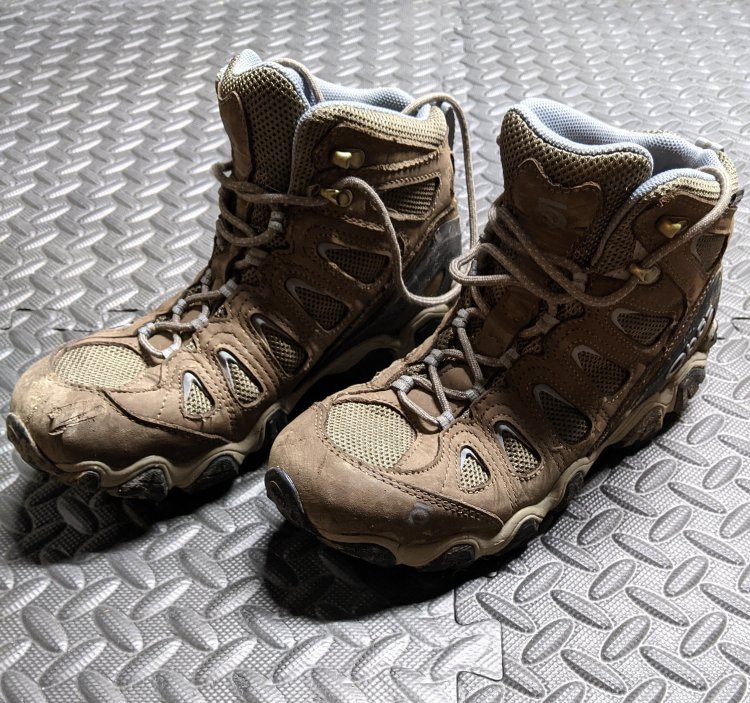
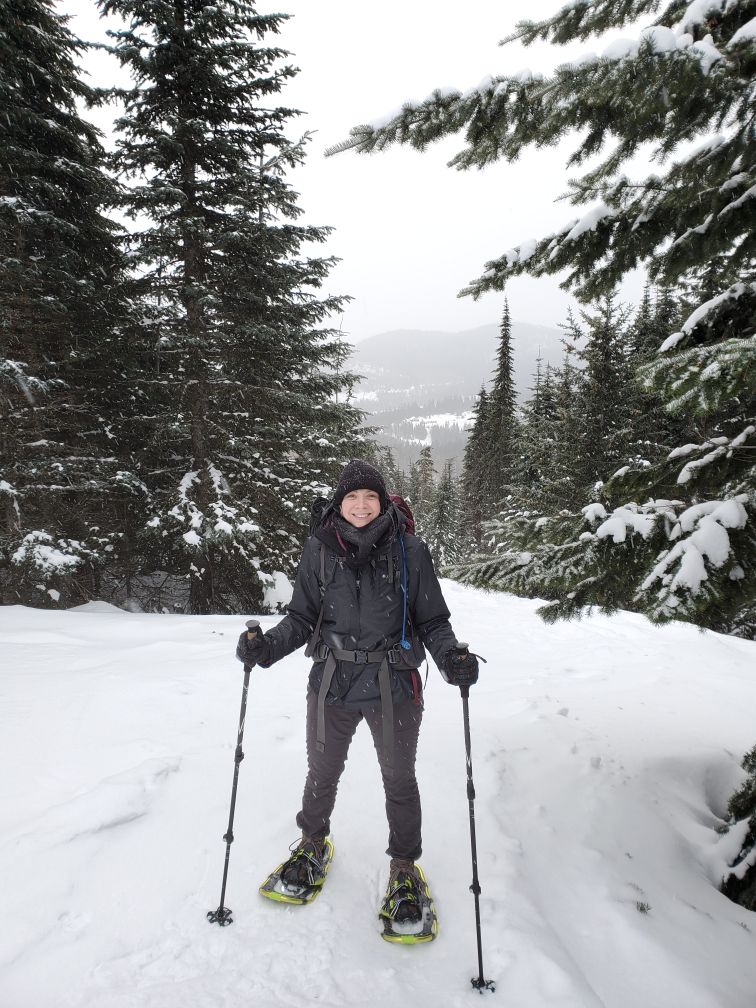
They are made with waterproof nubuck leather as well as breathable moisture-wicking nylon mesh liner. These boots do a great job of keeping moisture out unlike other shoes and boots I’ve worn that have not. I have been able to submerge them in creeks to rinse off mud and other muck, and my feet have stayed completely dry. I also wear them while snowshoeing without gaiters or other protection, and still my feet stay dry.

The boots are made with carbon rubber as well as a 3D molded heel counter to increase comfort. With previously undergoing ankle surgery, these boots provide great support and move with my foot but do not allow my foot or ankle to roll unnaturally. I particularly like the lacing system on these boots because I can tighten each section according to my needs.

I took my chances and immediately took them out for a 7-mile hike (I know, I know…) and they did not require any breaking in. They were extremely comfortable from the very first step and I did not end the hike with blisters or soreness.

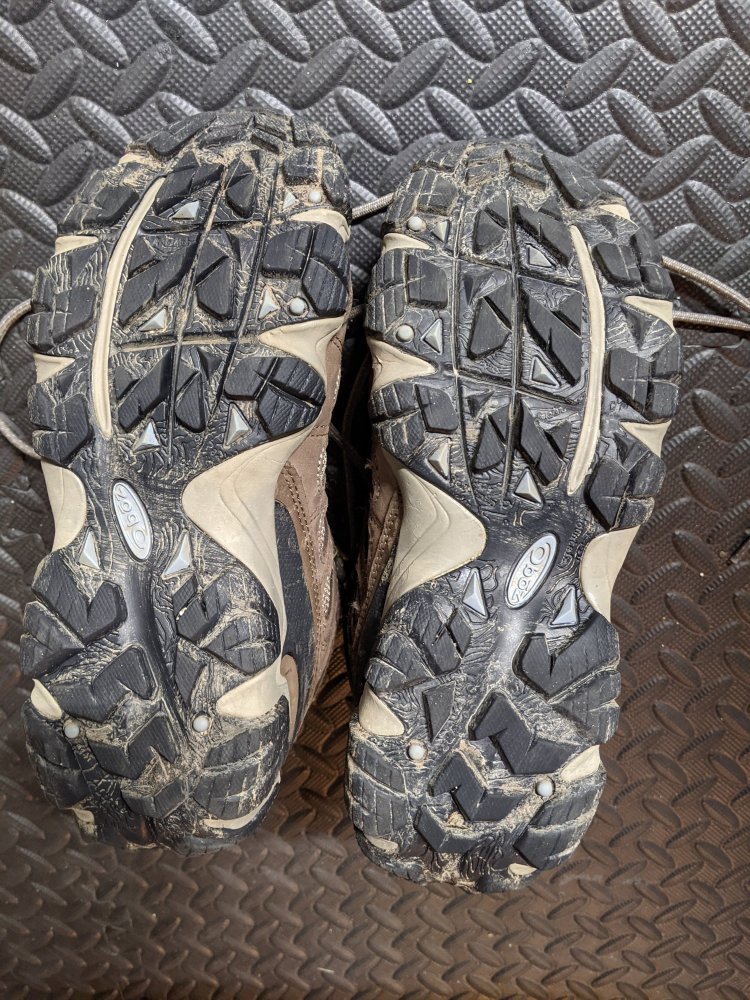
Fun face #1: the Sawtooth mountain range near Sun Valley, ID is molded into the bottom of the outsole.

Fun fact #2: A tree is planted for every pair of Oboz sold. Over 3.5 million trees have been planted

The retail price of this pair of boots is $155.00 and worth every penny. It comes in two color variations; Brindel/Tradewinds Blue and Pewter/Violet.

I highly recommend this pair of boots!

Liberty Creek and Edith Hansen Trail

For this hike, I went to Liberty Creek which is about 40 minutes from where I live. I was joined by my friend and neighbor, Rocki. We parked in the Liberty Lake Trail Head parking lot which is at the north end of Liberty Lake (it is important to note there is a $2.00 fee per person unless you are hiking this trail in the off season).

Photo by Rocki Martin

There are a few options for this trail; go right at the first fork in the trailand follow the equestrian trail or go left to hike the 2 1/2 miles to Liberty Falls. You can then decide if you want to turn around for a quick 5-mile hike or you can hike the additional 5 miles and complete the loop. With it being winter there is still, of course, snow in the waterfall area and the trail was extremely icy, so it is better to be going uphill. Also, the use of crampons is recommended, as well as trekking poles.

We decided to hike the loop counter clockwise so we could save the waterfall area (Liberty Falls) for last. Little did I know how breathtakingly beautiful this trail is! Bright green moss covered the rocks and trees, and mushrooms were growing horizontally from the trees as if to create shelves for the squirrels and birds to sit and rest. I also found a tree near the creek that looked like “land coral” with all the moss growing from it (which was actually one of my favorite finds). It felt as though we were on another planet.

You will come to a very steep hill about two miles into the hike but thankfully there were many small flat spots that are great for a quick rest. Once you make it to the top, you will hike a little further until you come to Hughes Cabin. It was dark and cold, and it felt as if it was trying to tell a story. I was fascinated by this cabin and was excited to research it a bit the following day. I learned it was built as an Eagle Scout project in 1987 then restored in 2010 by Jared Dineen of Troop 304, also as an Eagle Scout project. During the restoration it received new flooring, metal siding and a new metal roof. The cabin offers cots and a small fireplace which makes for a great spot to stop and rest, or even take a nap.

We met a nice couple in their mid-60’s and training for their upcoming 5-month backpacking trip across the Pacific Crest Trail. The man has Parkinson’s Disease and was shaking as he held his trekking poles for support, but it gave me so much hope that I, too, will someday be on the PCT. He said that he wants to spend as much time as possible on the trails before his health no longer allows him to do so.

Shortly after leaving Hughes Cabin we found Liberty Falls and while the couple we met earlier said the waterfalls can be disappointing, I have to disagree. Yes, it was a shallow waterfall but it was still beautiful in its own way. The ice formed around it in all different shapes while bits of Spring popped out from underneath the snow.

We eventually continued down the trail and while we were only about 2 1/2 miles away from the car, we were both hungry and ready to rest and eat lunch. So we found shelter underneath a tree dome and made ourselves comfortable.

I recently began dehydrating and making my own meals for hiking and backpacking and this was the first time trying any of my meals while on the trail. Rocki decided on tortilla soup while I went for chili. We were both impressed! The ingredients rehydrated just as they should have and tasted as if it had just been cooked that morning. Earlier in the day we also stopped for breakfast which consisted of a brown rice and berry cereal.

We continued down the trail and came across a large area of Liberty Creek with a bridge that went across. The creek still had quite a bit of ice covering it but it was flowing quickly. We stopped to take pictures, of course, and also clean the mud off our boots. The sound of the creek was refreshing and peaceful, a great hideaway to sit and read a good book!

This is a trail I will be returning to again in the next few months. One of my favorite things about returning to trails over and over is that it will always be different from one trip to the next. The colors, the smells, the wildlife, the view…everything.

I would recommend this trail. It is a total of 10.2 miles with a 1,374-foot elevation gain. It offers something for everyone!

Tortilla Soup – Dehydrated

15 oz can black beans
15 oz can diced tomatoes
1 cup frozen corn
1 small onion
2 tablespoons cilantro
1 jalapeno
2 vegetable bouillon cubes
1/2 teaspoon chili powder
1/2 teaspoon garlic powder
1/2 teaspoon cumin
1/2 cup dehydrated tortilla strips

1. Dice the onion, de-seed and chop the jalapeno, and drain the black beans.

2. Place beans, tomatoes, corn, onion, cilantro, and jalapeno on dehydrator trays. Keep everything in thin and even layers.

3. Dehydrate at 135F for 8-12 hours, until everything has dried.

4. Divide the dried ingredients into 2 servings, adding 1 vegetable bouillon cube, ¼ tsp chili powder, ¼ tsp garlic powder, and ¼ tsp cumin per serving. Pack tortilla chips separately.

5. On the trail: add the soup ingredients into a pot with 1 1/2 cups of water. Simmer for 10 minutes until the beans and corn are soft, adding more water if necessary.

6. Top with tortilla strips.

Brown Rice and Berry Breakfast Bowl – Dehydrated

1/4 cup dehydrated ground brown rice (or instant brown rice)
2 tablespoons powdered whole milk
1 tablespoon brown sugar
1/4 teaspoon cinnamon
2 tablespoons dehydrated fruit
1 teaspoon flax seed
1 teaspoon chia seed

I used apples, blackberries, and rasperries.

1. Mix ingredients together in a ziploc bag.

5. On the trail: abring 1/2 cup water to a boil. Carefully pour the boiling water into the bag with the mixture, stir, and close the bag. Then simmer for 5 minutes, or until the berries have rehydrated, adding more water if necessary.

Vegetarian Chili – Dehydrated

2 tablespoons olive oil
1/2 large onion
2 stalks celery, diced
2 tablespoons cumin
2 bell peppers
1 jalapeno
4 oz can diced green chilis
1/4 cup chili powder
3 cups any type of cooked or canned beans
2 cups frozen or fresh corn
Salt and pepper to taste

I used a mix of black, pinto, and kidney beans.

1. Heat the oil in a stock pot or dutch oven. Add the onion and celery and sautee until soft. Add cumin.

2. Add peppers, jalapeno, green chilis and chili powder, sautee until soft.

3. Add the tomatoes, beans and corn, cook until it’s all heated through.

4. Divide the chili into bags as evenly as possible to keep the correct water ratio.

5. On the trail: add 1 1/2 cups boiling water and close the bag (if you’re using a mug, be sure to put the lid on), then allow it to sit for 10-15 minutes until it is cooked through, adding more water if necessary.

Minestrone Soup – Dehydrated

1 small onion
1 medium zucchini
1 celery stalk carrot
1 (15oz) can cannellini beans, drained
1 (15oz) can diced tomatoes
½ cup elbow pasta shells
½ teaspoon garlic powder
½ teaspoon dried oregano
½ teaspoon dried thyme
½ teaspoon sea salt
¼ teaspoon red pepper flakes
2 vegetable bouillon cubes

1. Slice carrots, onions, celery, and zucchini into small, thin, uniform pieces. Place the vegetables onto dehydrator trays making sure none of the pieces overlap.

2. Drain the canned beans and spread in an even layer on a dehydrator tray.
Spread the tomatoes in an even layer on a dehydrator tray.

3. Dehydrate at 135F for 10-12 hours, until the veggies are completely dried.

4. Divide the dehydrated vegetables, pasta shells, garlic powder, oregano, thyme, salt, red pepper flakes between two resealable bags or containers along with 1 veggie bouillon cube per serving.

5. On the trail: add the contents of the bag to a cook pot along with 2 cups water per serving (enough to cover the pasta). Bring to a boil, then simmer for 8 minutes, or until the pasta has cooked through and the veggies have rehydrated, adding more water if necessary.

Iller Creek and Rocks of Sharon

For this hike, I went through Iller Creek located in the Iller Creek Conservation Area near Tower Mountain and the Dishman Hills Natural Area. It is about a 30-35 minute drive from where I live. I hiked with my cousin, Paullena, as well as her husband, Kyle, and my friend, Rocki.

From the Iller Creek trailhead, take an immediate left. This direction is much more gradual of a climb than if you were to take an immediate right from the trailhead. You will eventually come to a “Y” in the trail; you can either follow the trail to the right for the upper valley trail, or you can follow the trail to the left and head towards Rocks of Sharon.

Photo by Rocki Martin

If you have the time to go through Rocks of Sharon, you definitely should. It offers a beautiful view and the rocks are incredible! Each one is so different and unique, and has a breathtaking view in the background.

Please note: there are many photos online of cairns (stacked rocks) created by people. According to the U.S. National Park Service, it is extremely important to not move the rocks. Moving rocks disturbs the soil and makes the area more prone to erosion. Disturbing the rocks also disturbs fragile vegetation and micro ecosystems.

As we got to the bordering trail for Rocks of Sharon the wind began whipping us around the trail and there was an icy snow falling from the sky. We decided against hiking into Rocks of Sharon and stayed on the bordering trail.

Note: if you want to hike into Rocks of Sharon, turn onto Stevens Creek Trail where it meets with Iller Creek Loop Trail. Follow the trail southwest which will take you through the heart of Rocks of Sharon and at the “Y” in the trail, follow it to the right. You will then find Big Rock and meet back up with Iller Creek Loop Trail at another “Y” in the trail. Follow the trail to the left and you will be back on your original trail towards the Iller Creek trailhead.

Photo by Rocki Martin

We eventually hiked back down into the trees and found a cave of trees just big enough for the four of us to stop for hot coffee and lunch. I decided on chicken and dumplings which did not disappoint!

We rested for about an hour before packing up and continuing down the trail. We even met a friendly dog who was happily hopping through the snow with its human not far behind.

The last few miles of our hike took us along Iller Creek and a few spots required us to hop across the small streams that went into the creek. I highly recommend using crampons for this trail during the winter months, as this section of the trail is extremely steep and icy. The crampons really make a difference!

We eventually hopped over the last visible area of Iller Creek which was completely frozen over (there are large rocks in the middle of the creek for you to cross over). I always enjoy seeing a trail covered in snow after seeing it in its beautiful green glory. Mother Nature truly is amazing!

This hike is about 5 1/2 miles and if you go through Rocks of Sharon, you will add about 2 miles for a total of about 7 1/2 miles with a 1,496 ft elevation gain.

Consumed this hike:

Mountain House Chicken and Dumplings with vegetables

Kuju PourOver Coffee, medium roast (Base Camp Blend with Oak, Chocolate, and Honey)

Gregory Deva60 Pack and 3D Hydro Reservoire

Last November I decided to upgrade my daypack to a backpacking pack and after being fitted for a few different packs, I decided on the Gregory Deva60 in plum red with the Gregory 3-liter 3D Hydro Reservoir. With hiking longer trails and planning multi-day backpacking trips, I wanted a pack that felt comfortable with a generous gear capacity.

What I like most about this bag (other than the color) is its patented A3 suspension. This allows both the harness and hip belt to pivot independently of each other, adapting instantly to the shape of your body and your movements. The main benefit to this is that it aligns your center of gravity and follows your body’s movement over unsteady terrain and climbs, and the silicone gripping prevents it from sliding on your back, shoulders, and hips. It also has an internal aluminum frame with a removable lumbar support. Whether I’m out for a 2-mile or 10-mile hike, my pack typically weighs 25-26 pounds and this pack performs exactly as I need it to. The pack itself weighs just under 5 pounds.

The main compartment has three access points: top, bottom, and full front u-zip which makes loading and unloading much easier. There is a removable divider as well to separate the sleeping bag compartment from the main compartment. I use the sleeping bag compartment for holding extra clothes while out on my regular hikes. The top flap has a zippered pocket which holds the fitted rain cover or anything else you might want to store in it.

There are plenty of pockets and additional straps to hold your gear. This includes a stretchy mesh side pocket for sandals or camp shoes as well as a bottle holster, which I use to hold a soup thermos or coffee mug. I particularly like that the bottle holster cinches at the top for a snug hold. As for the additional straps, there are dual attachment loops with upper locks as well as many pull straps. I use one attachment loop for my trekking poles and the second for my camping stool. The hip belt also has two zippered pockets.

The pack includes a removable hydration sleeve with a harness and pocket that can also be used as a daypack. It’s perfect for a quick hike away from your base camp.

The Gregory 3-liter 3D Hydro Reservoir has many great features for “just” being a water reservoir. It has a built in hanger that flips out and the 3D technology prevents contact between the top and bottom layers while hanging open, allowing it to dry quicker and reducing the risk of bacteria growth.

The bite valve has a quick on/off button to avoid any leakage and the quick-disconnect coupling of the hose makes it easy to refill the reservoir without having to unthread the hose from the pack. The only downside to the quick-disconnect is that it causes air bubbles when it is reconnected.

The handle on the outside makes refilling the reservoir much easier.

Please remember to ALWAYS, ALWAYS, ALWAYS clean your water reservoir after EVERY USE!!

The retail price of this pack is $299.95 and worth every penny. It comes in three beautiful colors; Plum Red, Antigua Green, and Nocturne Blue. It also allows the ability to switch out the hip and chest belts so you’re sure to get the best fit for your body.

The retail price of the 3D Hydro Reservoir $39.95

I highly recommend both pieces of gear.

Bald Knob

For this hike, I went to Bald Knob near Mount Spokane with my cousin, Paullena. It is located about 30 minutes from where we live. We parked in the snowmobile parking lot along North Mount Spokane Park Drive and hopped onto Trail 131, which took us right along North Summit Road. This road is currently closed to vehicles but is open to snowmobiles and other winter recreational activities. As you get closer to the summit, you will come across Trail 132 which is a bit longer of a trail, or you can continue on Trail 131. Both trails will come back together and turn into Trail 130 which will is the final ascend up to the summit.

Trail 131 was beautiful in the early morning. The dark green trees looked vibrant against the bright white snow and there was a thick blanket of fog in the distance. There was enough snow to cover the bases of any signs we came across as well as the door to an outhouse we found along the trail. This is a trail that I highly recommend the use of snowshoes to avoid sinking to your waist in the powdery snow.

It was calm and quiet though every once in a while you would hear the faint sound of a snowmobile. We also found a downhill ski trail about halfway up Trail 131 with signs to indicate snowshoes are not allowed on that trail, so we were careful to avoid hiking across it.

We made it to the Bald Knob picnic area in about 37 minutes, which is near the Bald Knob campground. There was a covered area like that of a gazebo which had picnic tables underneath which was great for eating breakfast. We pulled out our Jetboil Flash cooking systems; my cousin decided on biscuits and gravy while I decided on blueberry granola with a cup of hot coffee. With it being only 4* outside the hot coffee was the perfect treat. If you are new to hiking and/or backpacking, the Jetboil Flash is a fantastic cook system. It boils water in roughly 100 seconds and uses very little fuel. I will be sure to post a full review of this cook system very soon!

We stayed at the picnic area for about an hour before we decided to head back down the trail. We followed the same path as took up to the summit, Trails 130 and 131. The hike back down the mountain was fairly quick and we were met by a few other hikers along the way. 

If you are looking for a quick hike, I would recommend this trail. It’s a total of 3.5 miles with a 650-foot elevation gain. It offers a beautiful view and the picnic area at the top is the perfect spot to rest and eat a snack or meal. It also offers the option to connect with Trail 130 at the summit and hike up to the CCC Cabin which adds about 2 miles to the hike.

Consumed this hike:

Mountain House Granola with Milk and Blueberries

Mountain House Biscuits and Gravy

Kuju PourOver Coffee, medium roast (Base Camp Blend with Oak, Chocolate, and Honey)